How to send a chat message from Microsoft Access 365
You will see detailed information on this page to show how to send and receive chat messages with Microsoft Access 365 database tables. Please follow these steps and screenshots to configure the connection to perfectly read lines from the outgoing message table and paste lines to the incoming message table. The default table names are 'ozekimessagein' and 'ozekimessageout'.
On the previous page you might have read how to connect to the Access 365 database and set the SQL statements, but on this page you can see it from the aspect of your Microsoft Access database. At the bottom of this page you can see how to send and receive messages with simple examples.
This example contains a database which you can download from here: ozeki_database.accdb
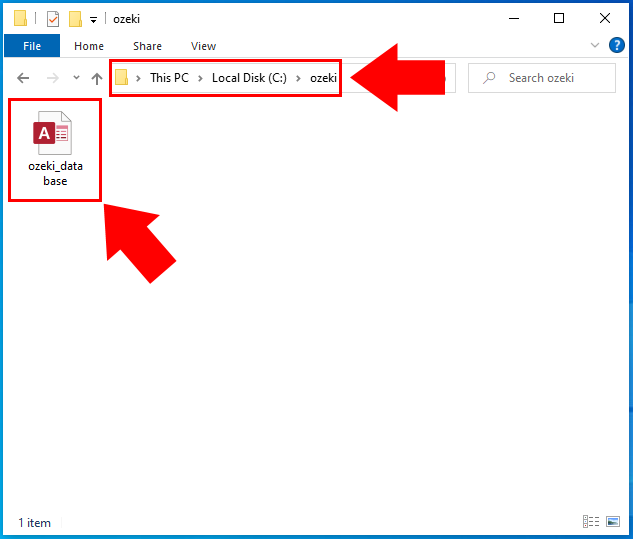
After you have downloaded 'ozeki_database.accdb', please place it to a selected folder. In this tutorial it have been saved to the C:\Ozeki\ folder (Figure 1) Although you can save it to any other location. Please memorize the file's location. Later on you will have to use this path in the connection string. You can check the path from the 'File Explorer' (Figure 1). The file is an Access 365 database file.
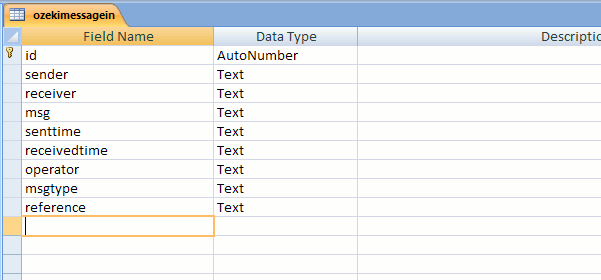
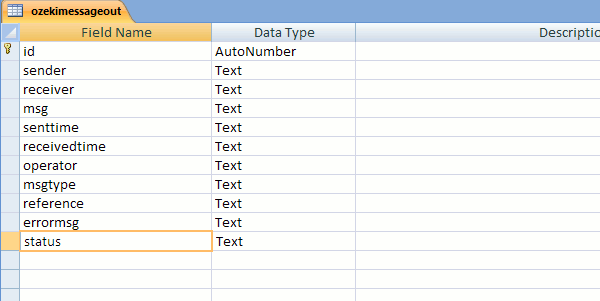
Just before you start configuring your database connection, please make sure that these two database tables are created in your database file: 'ozekimessagein' and 'ozekimessageout' (Figure 2 and Figure 3).
Step 1 - Setup a database connection
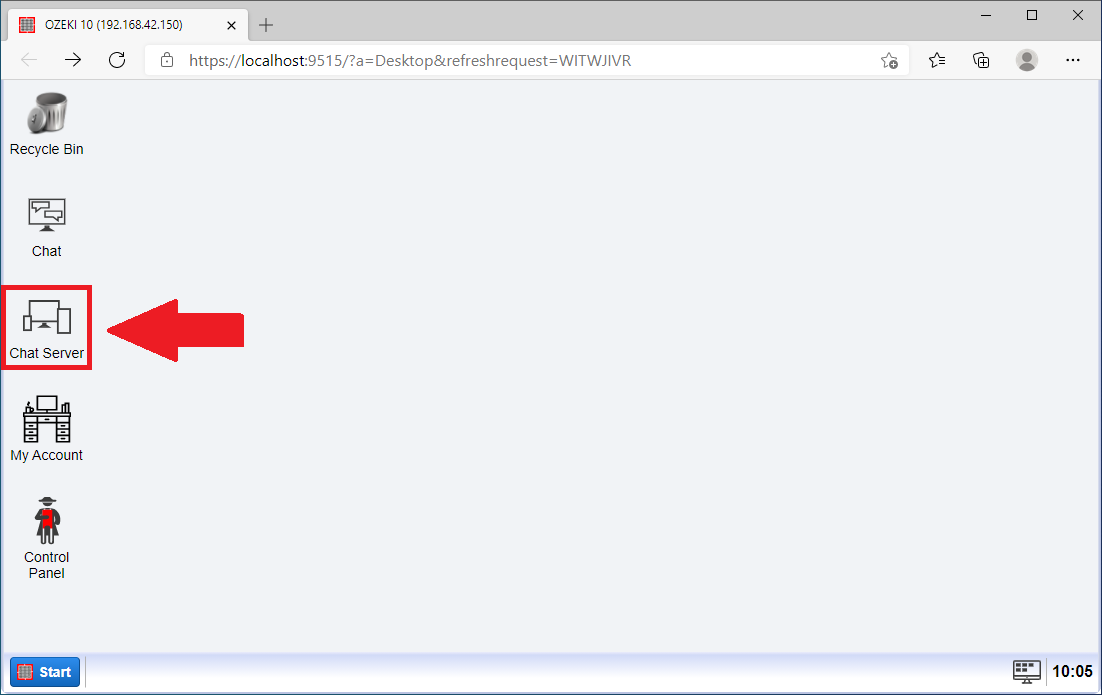
The first thing you need to do is is to setup a database connection in Ozeki Chat server. To do this, first, open the Chat server, and select the Control Panel icon from the desktop (Figure 4).
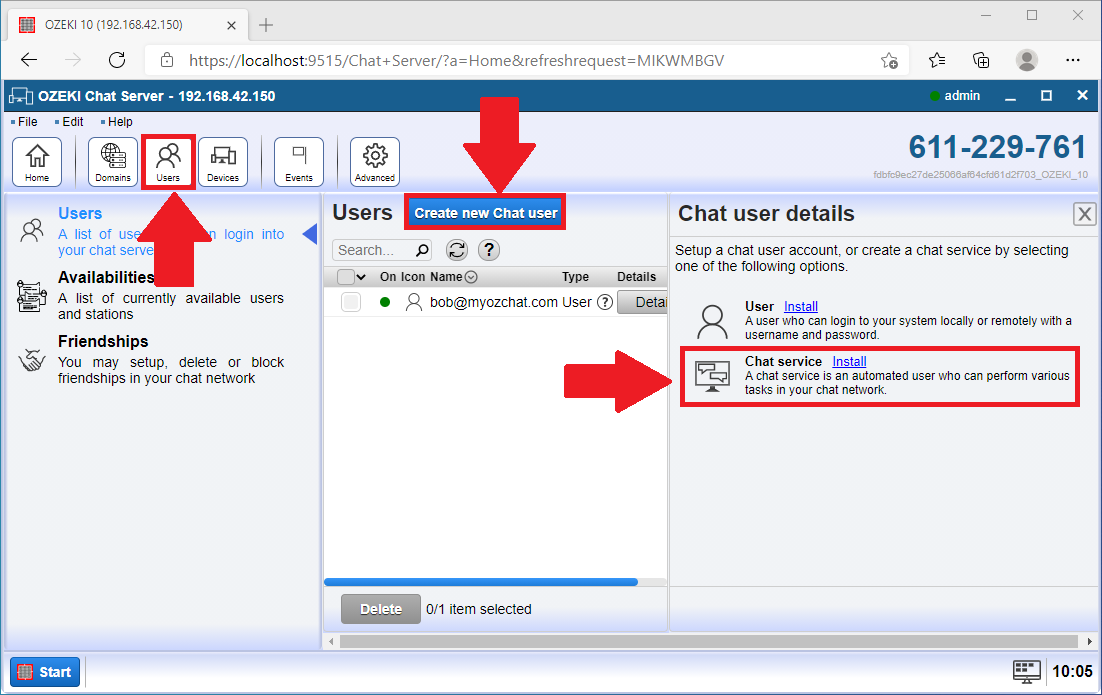
By following this guide, you will be able to see how you can create an SQL connection with a Access database, so to follow that guide, just click on the Create new connection button and select the Application option as you can see it in Figure 5, Figure 6 and Figure 7.
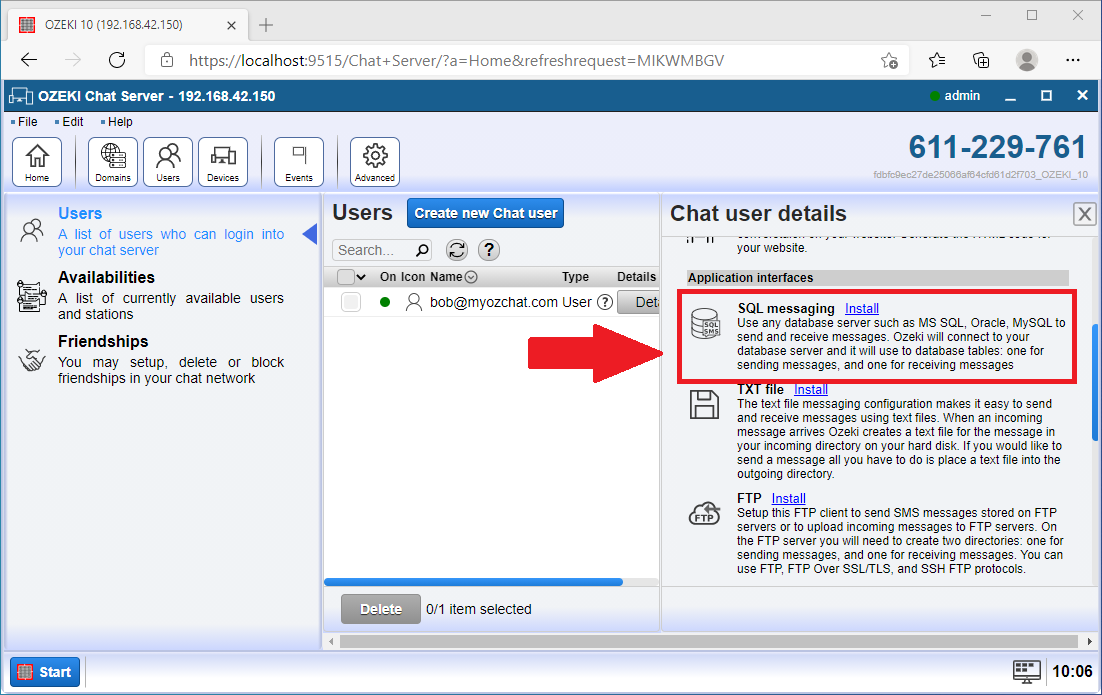
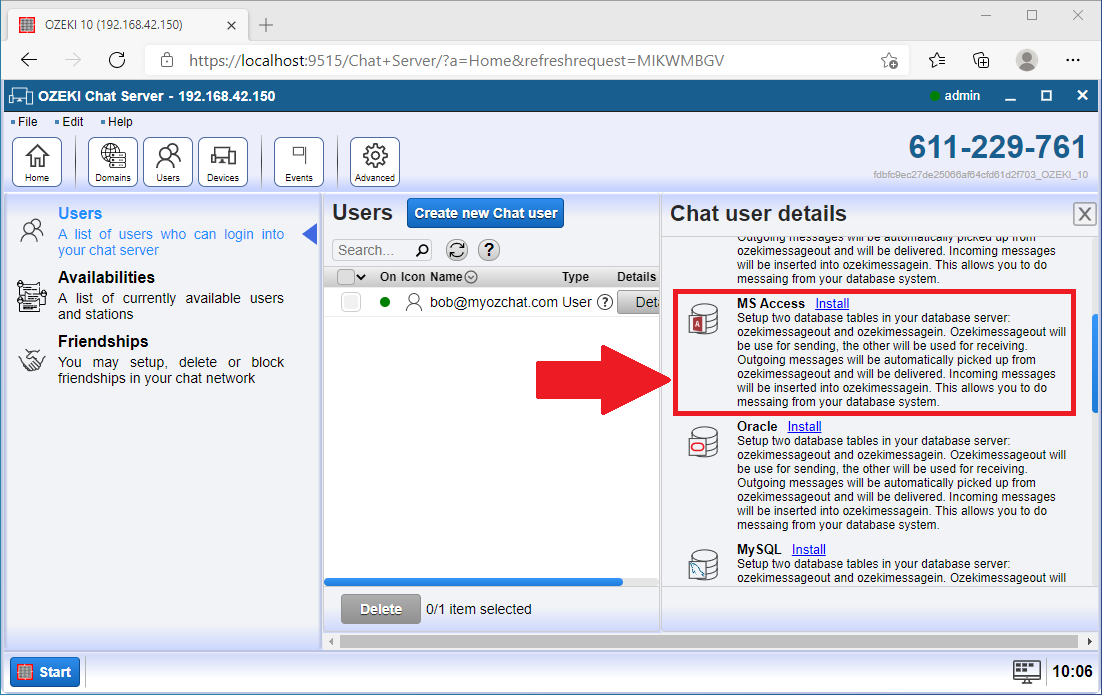
Next select the SQL Messaging and then the Access options as the Figure 7 shows.
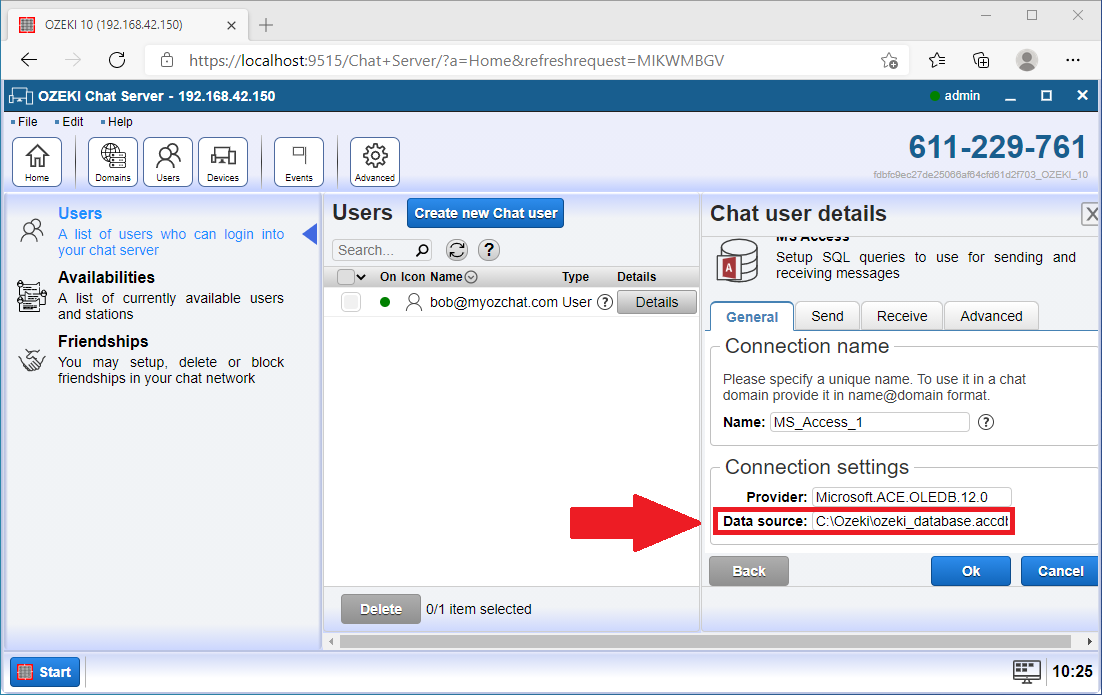
The last step of the creation of the database application is to connect it to your database server by filling the fields of the Connection Settings. Here you have to give all details about the database that you want to connect to. The Database User can be installed on your Ozeki Chat server. Keep in mind to change the 'Data Source=' parameter to the location of 'ozeki_database.accdb' (Figure 8).
For Microsoft Access, the next step is very important because without it, Select queries will not work. Switch to the 'Sending' and tabpage and remove the apostrophes (' ') around $id (Figure 9).

Step 2 - Add MySQL connection to the Chat client
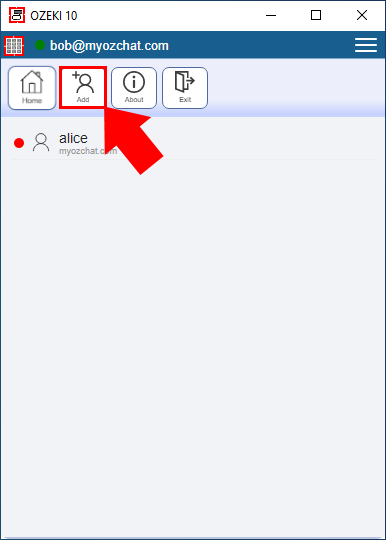
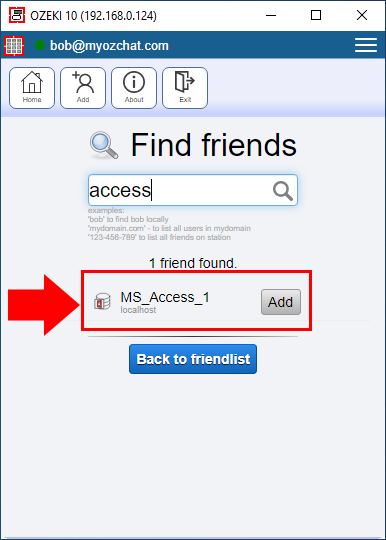
The following step is to open the Chat client application and login to your Chat system with your username and password. Select the 'Add' button (Figure 10) and from the available friends search the Access connection what you created earlier as you can see in the Figure 5, Figure 6 and Figure 7.
Step 3 - Send chat message from a database
With all connections set up properly in Ozeki Chat server, now you can start managing chat messages from a database. Now, you will be able to see, how you can send an chat message by using only one SQL command. By default, Chat server uses ozekimessageout table to send messages.
Sending a message can be done by simply just inserting the message into the ozekimessageout table. The Chat server periodically checks this table and sends the newly added messages. To insert a message into this table, just type the corresponding INSERT command as you can see it in Figure 12. In the textbox, you can change the values which represent the receiver and the message itself. When you finished with writing the message, just Execute it and your message is about to be sent.
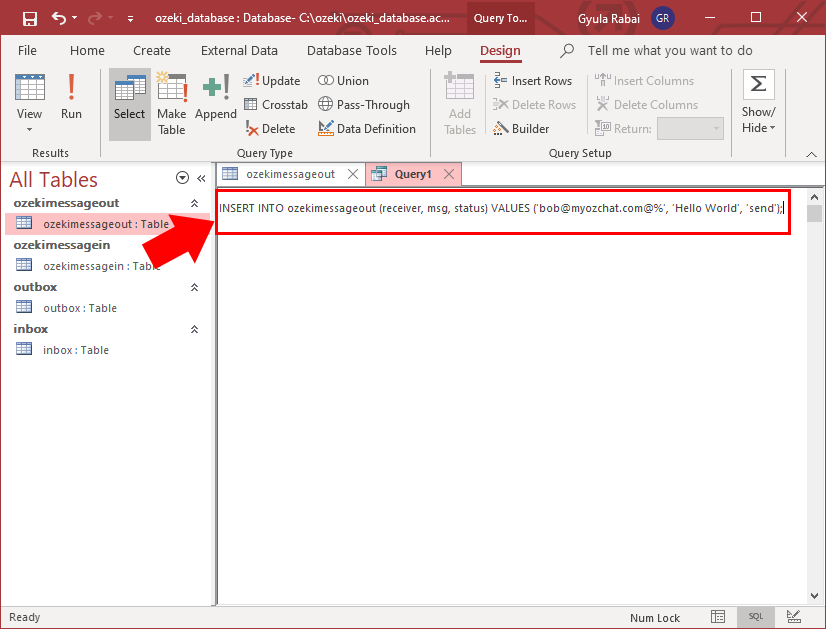
When sending a Chat message, the format of the receiver is very important. The most important point you can discover is that it has two @ character in it. This is because the address is as follows: user@domain@station . In the current example, you can see that we use the % character instead of station, which means that the message will be sent to all stations of the user. So if a user is logged in on more than one device, all of them will receive the message.
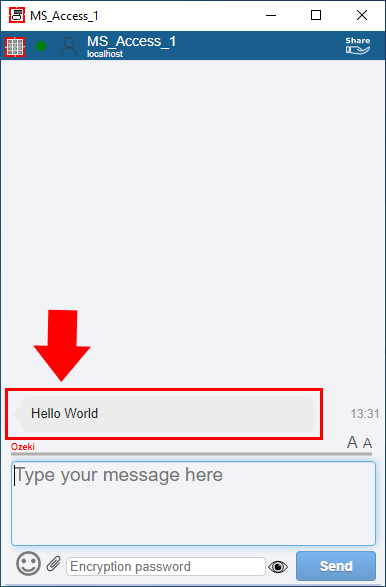
Now you are able to see that message will received in the Chat client conversation as the Figure 13 shows.
Step 4 - Send chat message to a database
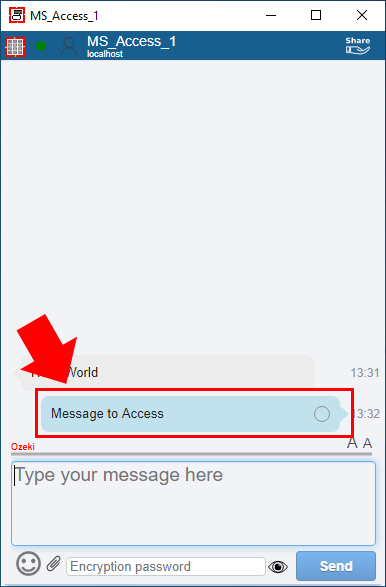
Next you can send message form the Chat client to the database server. Open the conversation and send your first message. You will see the message appeas in the Chat conversation (Figure 14).
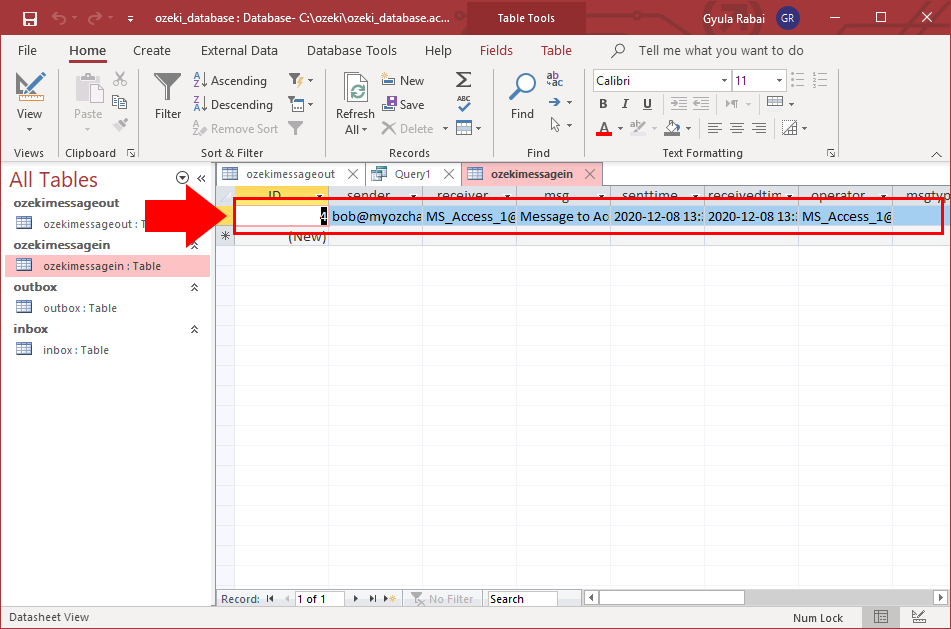
The incoming messages from any chat connection will be inserted into the ozekimessagein table by default. To check these messages, you can start a query in the database application. So, open the application, and run a Select command what will query the incoming messages and Execute it. If the execution was successful, you will be able to see the incoming message (Figure 15).
More information
- How to setup an SQL to Chat Server
- How to setup an SQL to Chat Server
- How to setup an SQL to Chat Server
- How to setup an SQL to Chat Server
- How to setup an SQL to Chat Server
- How to send a chat message from Microsoft Access 365

 Sign in