How to send Chat messages from TXT files
This guide will teach you, how to send chat messages from a file, and receive them. You will also learn, how to install and configure a TXT file connection in the Chat software and the the location of the following folders: Inbox, Outbox, Sent, Failed, Delivered.
Step 1 - Create a TXT File connection
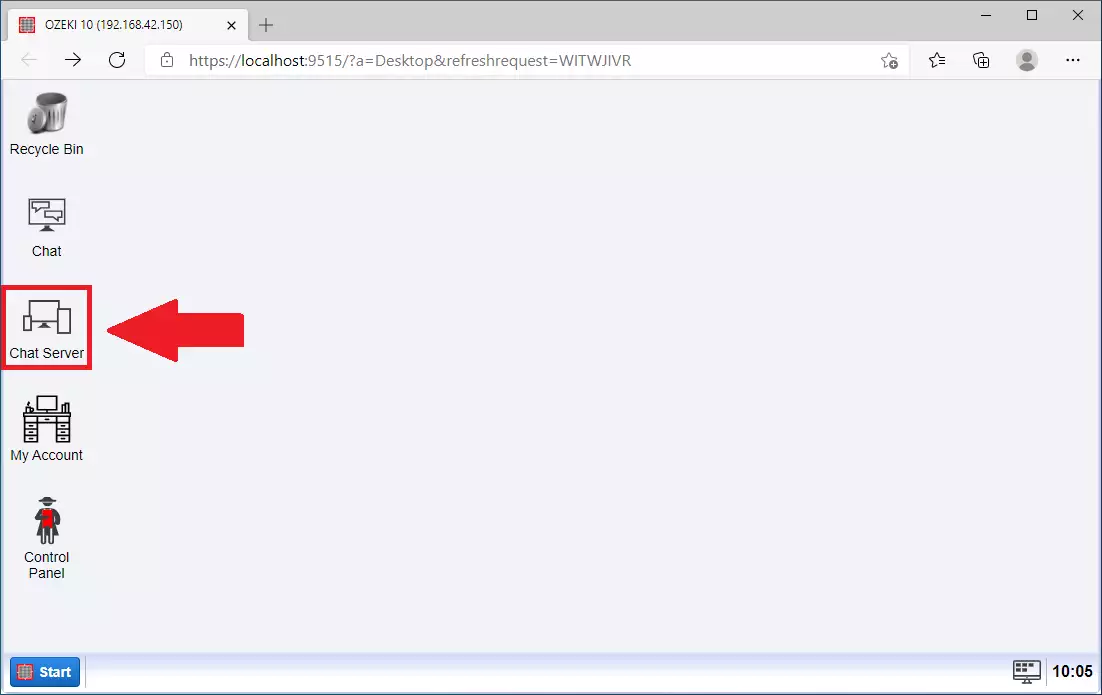
The first step of sending SMS messages from a txt file is opening the Chat Server application from your desktop. If you don’t find the icon that you can see on Figure 1 on your desktop, please search for it in the Start menu of the Ozeki OS.
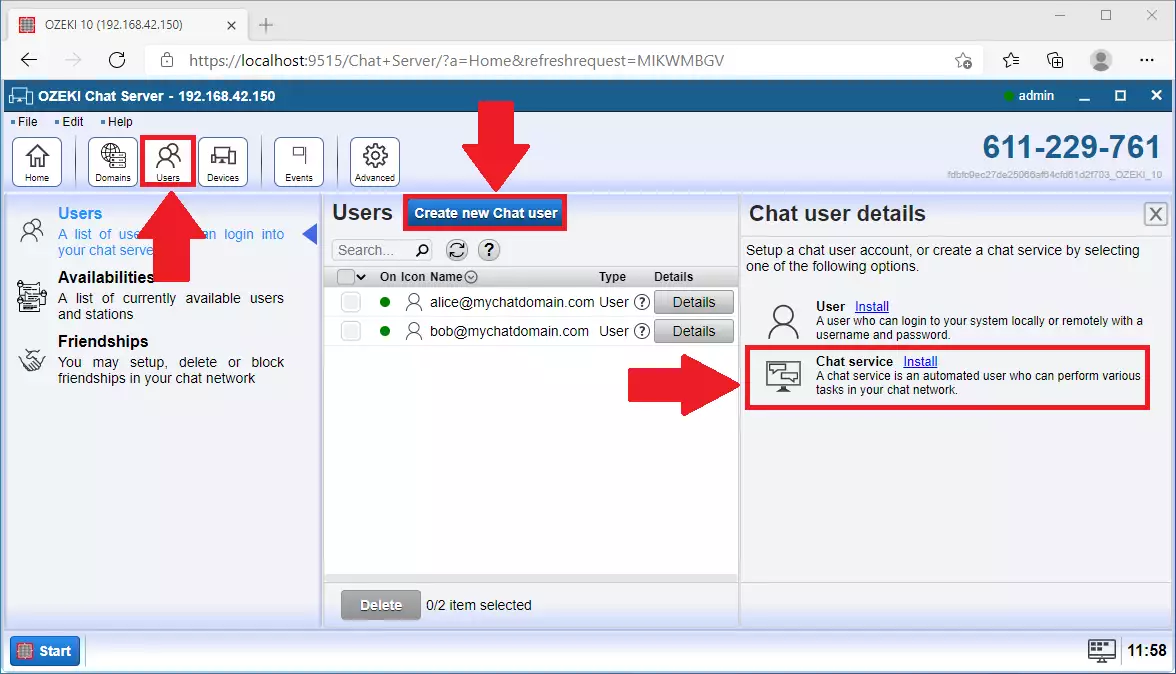
Now that you have opened the Chat Service application, please click the Users button located on the upper side of the window, then click the Create new Chat user and choose the Chat service option located on the right-side of the window. Click the blue Install button to proceed with the steps. You can see the process on Figure 2.
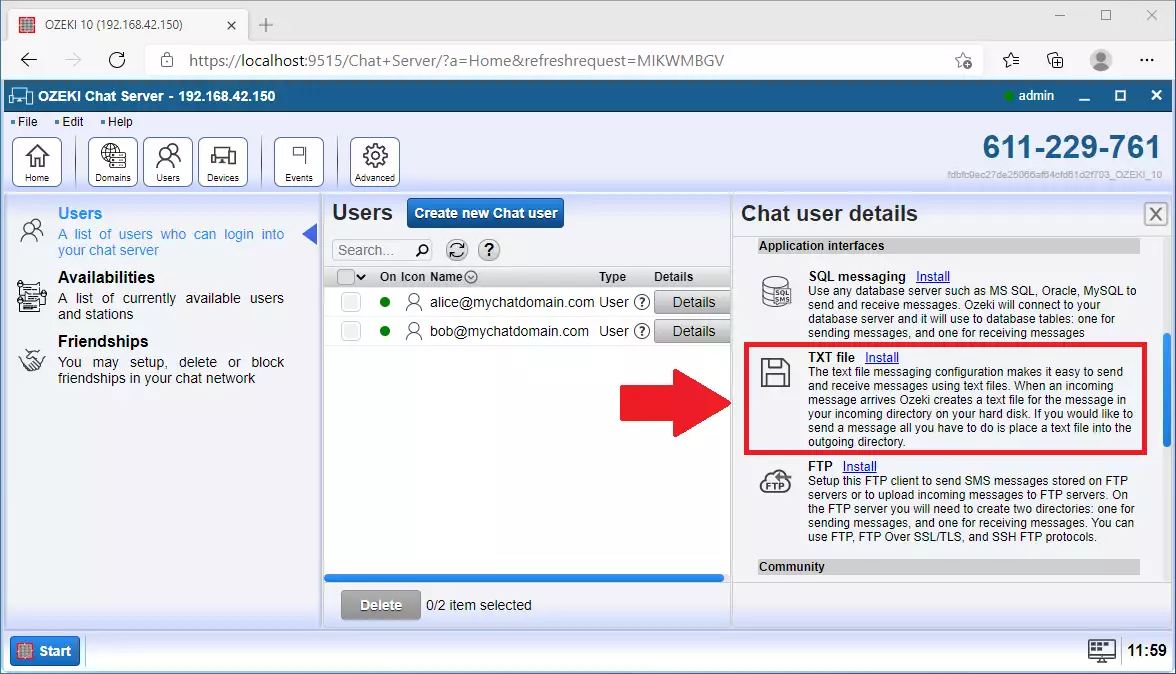
Now, look for a TXT file option located on the right side of the screen. Click the blue Install button to proceed. On Figure 3, you can see where to click.
Step 2 - Configure the TXT File connection
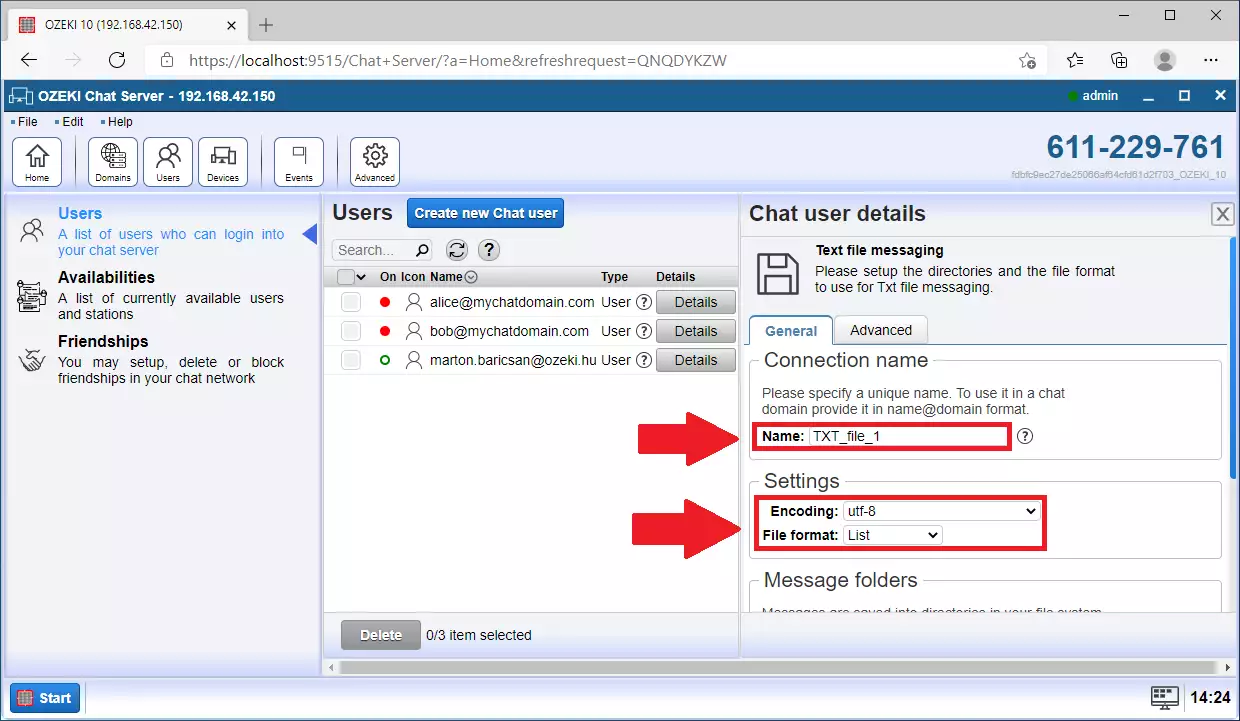
After you have successfully selected the TXT File connection, you will be presented with the TXT file configurator. Here you get tot choose a name, encoding and a file format for your TXT File. Provide that information to proceed. You can see an example on Figure 4.
Step 3 - Select a file format
For that connection, you can select from multiple file formats. These formats handle the messages differently. The first format is the 'Simple'. The format can handle one message per file. The name of the file needs to be the recipient's phone number and the message contains the SMS message itself.
The 'List' file format is capable of handle multiple messages and multiple recipients in the same file. Each row of the file contains the phone number of the recipient and the message. The file extension of the List format is .sml.
c:\Ozeki\TXT_file_1\out\messages.sml
Step 4 - Select folders for the messages
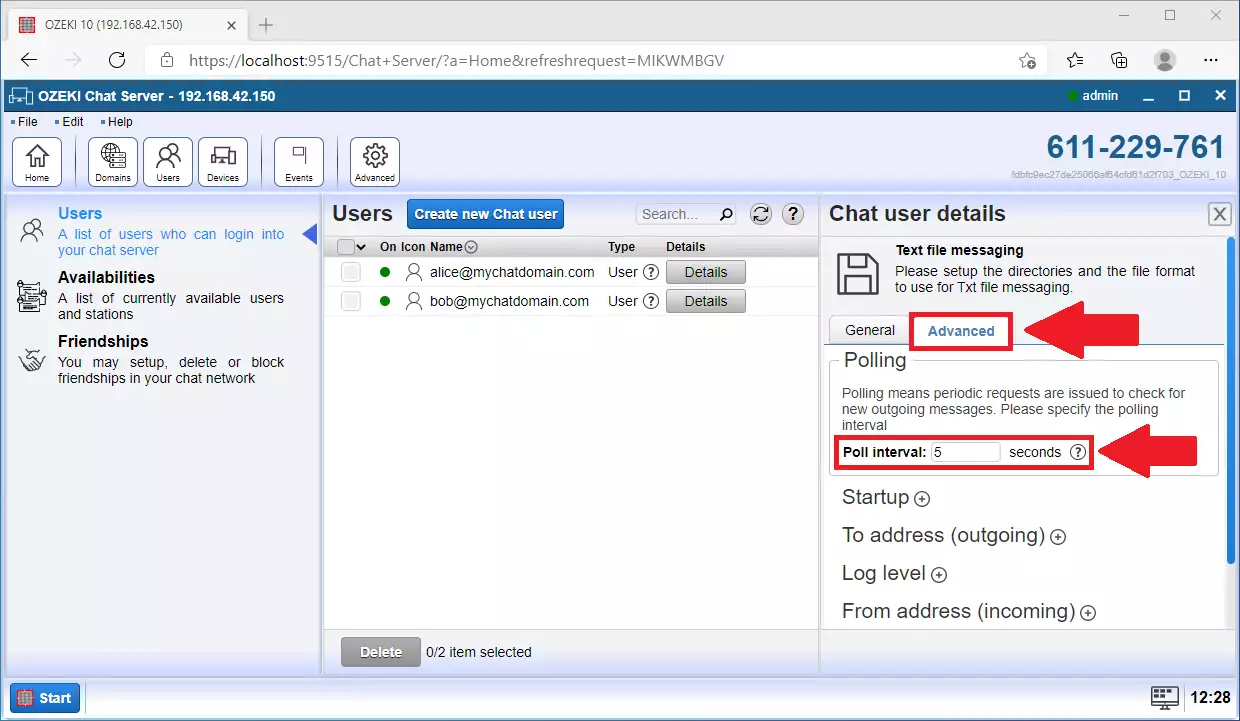
After you have successfully selected the TXT File connection, you will be presented with the TXT file configurator. Here you get to choose a name, encoding and a file format for your TXT File. Provide that information to proceed. You can see an example on Figure 5.
Step 5 - Advanced configuration of the TXT File connection
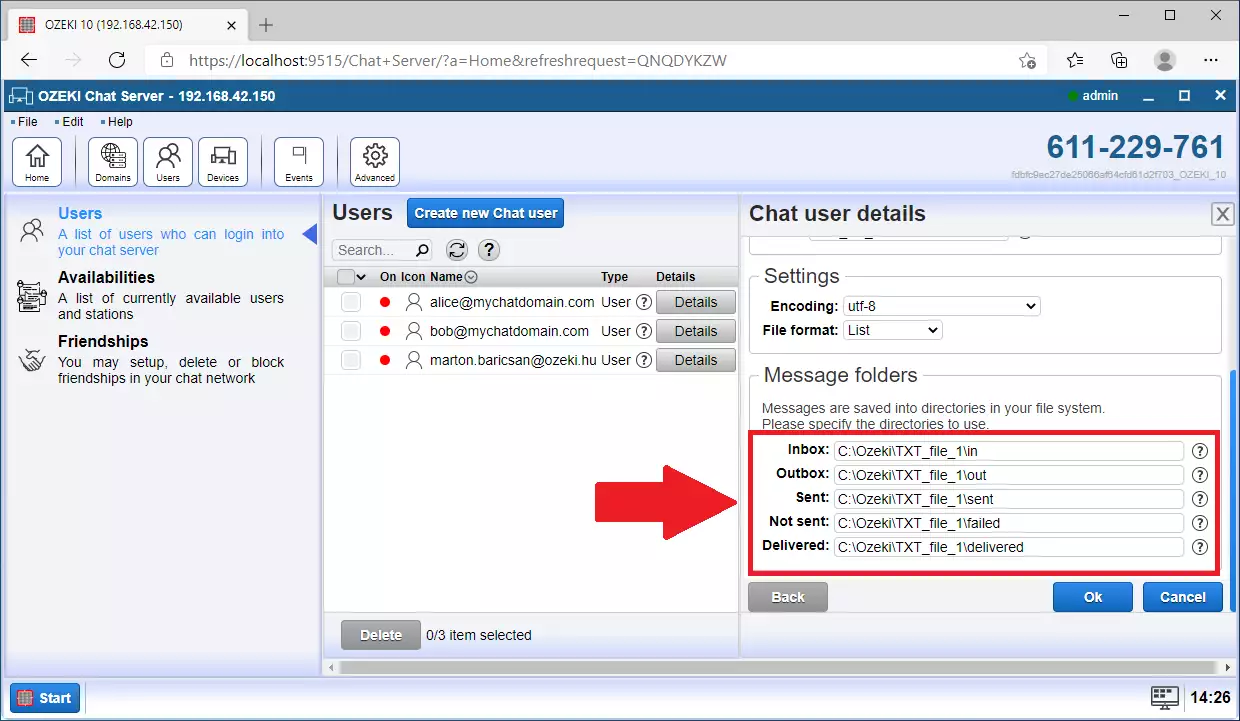
The messages you are working with will be stored in folders. In this step, you need to set the location of the 5 different types of messages. Those are: Inbox, Outbox, Sent, Not Sent and Delivered. You can see example locations on Figure 6.
Step 6 - Send a message from file
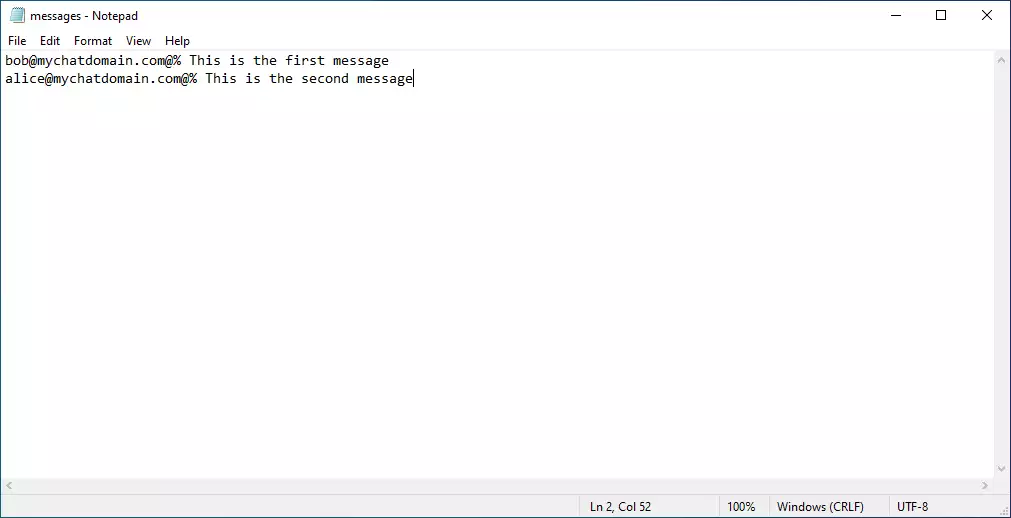
After you have successfully created the connection, you could start sending messages using the outbox folder. Create a new txt file in the predefined location and start typing your message using the given format on Figure 7. As you can see, you can write multiple messages to multiple recipients, the connection will be able to handle all of them. After you finished, please save the file.
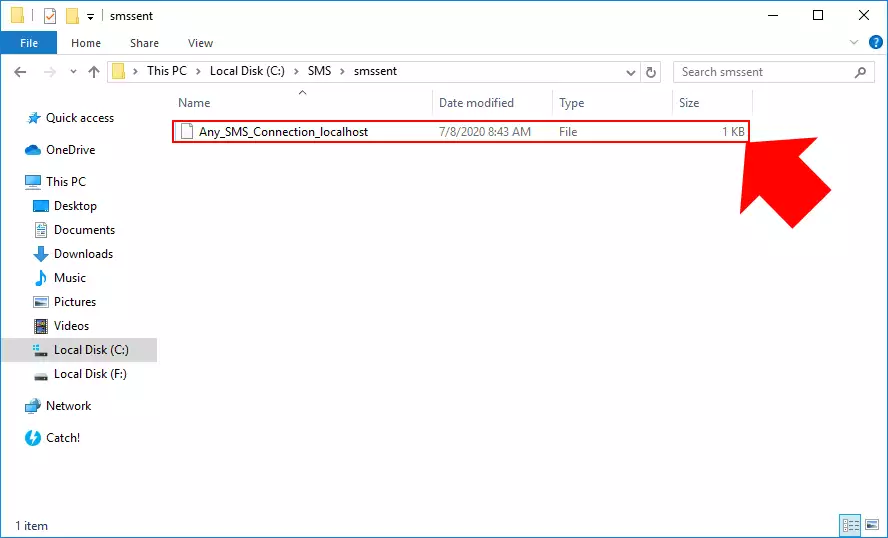
At the next poll from the TXT File connection, the file will disappear from the folder. This means that the message is being processed. If it is successfully sent, you will be able to see it in the sent folder, as you can see on Figure 8.
Step 8 - Receive message with the TXT File connection
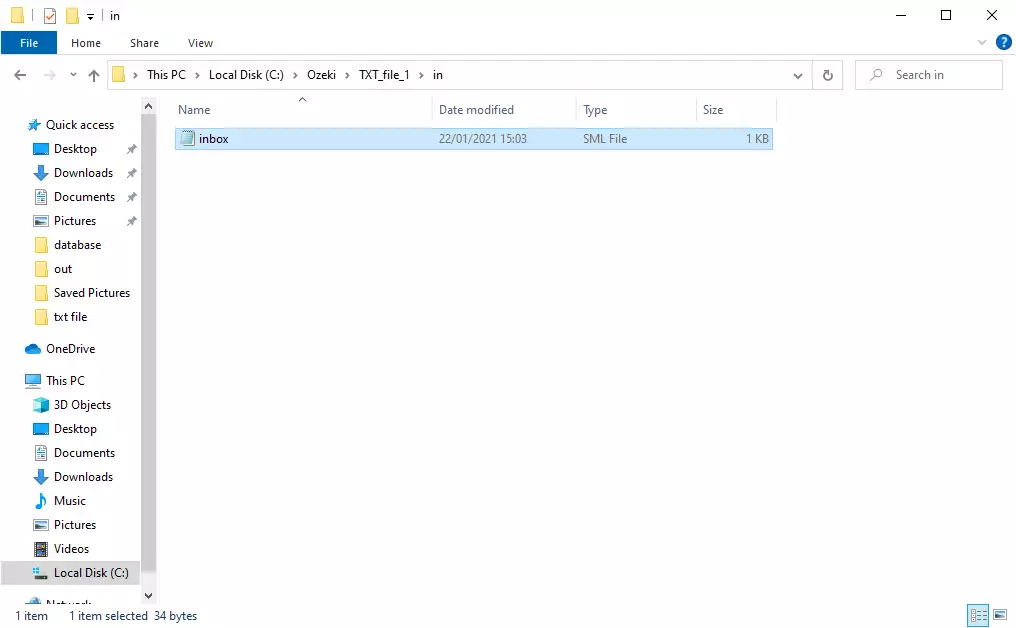
In case of an incoming Chat message, the Connection will create a new TXT file in the incoming folder, that you could open and read or forward to another recipient. You can see an example on Figure 9.
More information

