MS SQL Troubleshooting guide
This guide is intended to give you hints, that might help you fix a broken Microsoft SQL Server or Microsoft SQL Express connection. In general a reinstallation of the database server usually fixes the problem, but in most cases reinstallation is not an option. Here are the things to check if you cannot connect to your SQL server:
- TCP/IP settings in SQL Configuration Manager
- How to create tables with MS SQL command line
- How to find the server details in the MS SQL Manager
- MS SQL Server Configuration Manager Missing from Start Menu
- How to setup Firewall Read more about Firewall configuration for SQL Access.
- Change MS SQL registry key
To troubleshoot a MS SQL Database connection, you will need to get into the SQL Server Network Configuration panel, where you will find the protocols paired to the Network.
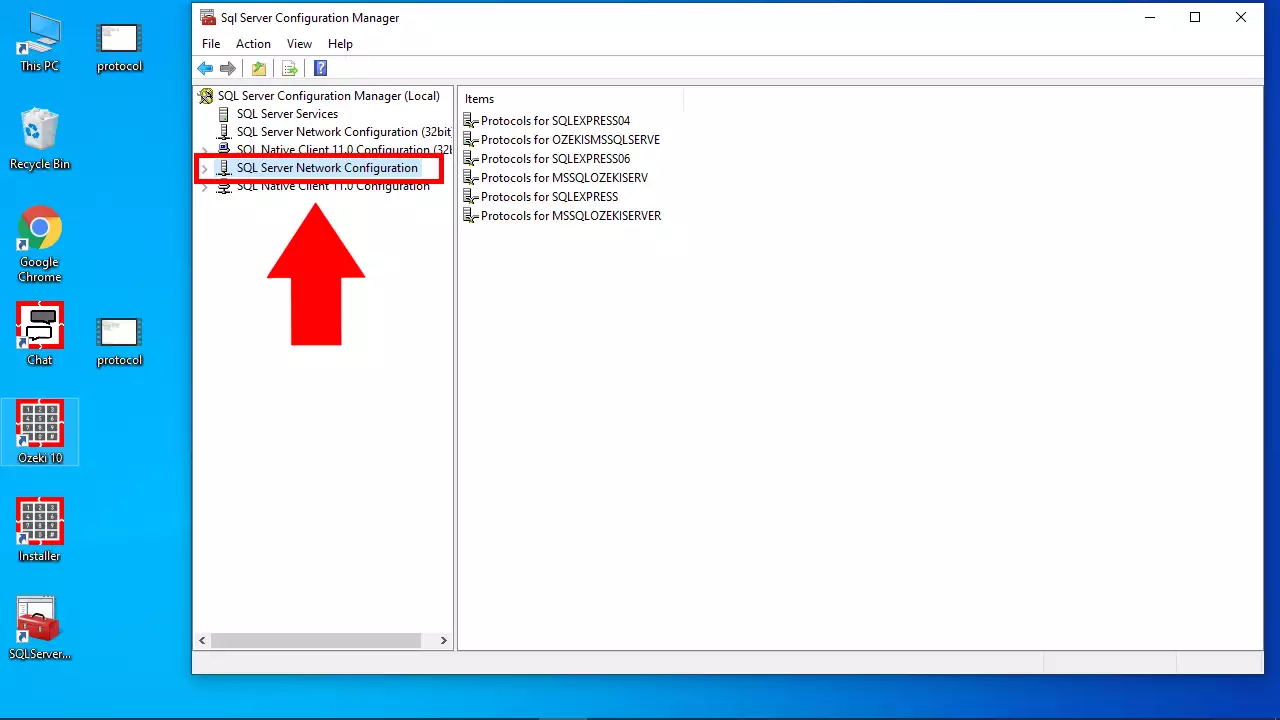
To check if everything is in order, please choose Protocols for MSSQLOZEKISERVER. It will display all the configurations which you can modify, on the right side of the manager.
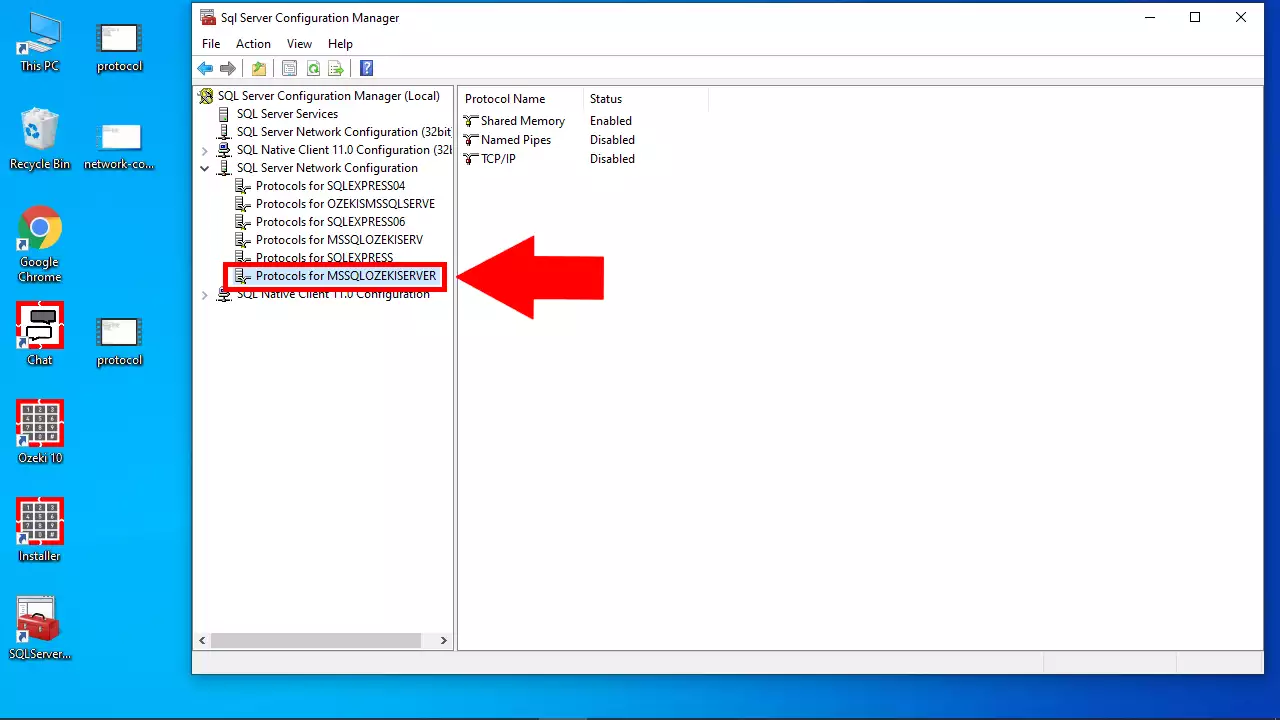
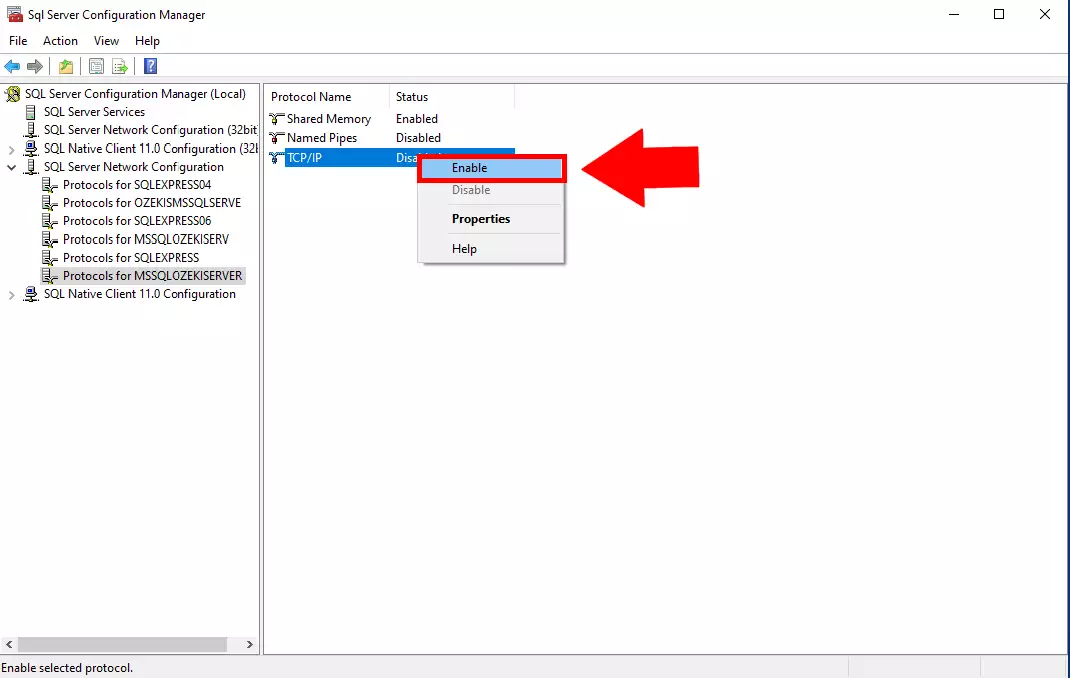
if you find that the TCP/IP is disabled, your SQL Server will not connect to any network. Make sure to enable it in order to have a working SQL Server. As you can see on Figure 3, you will need to right click the TCP/IP option and click enable. If it is already enabled, please continue with the next step.
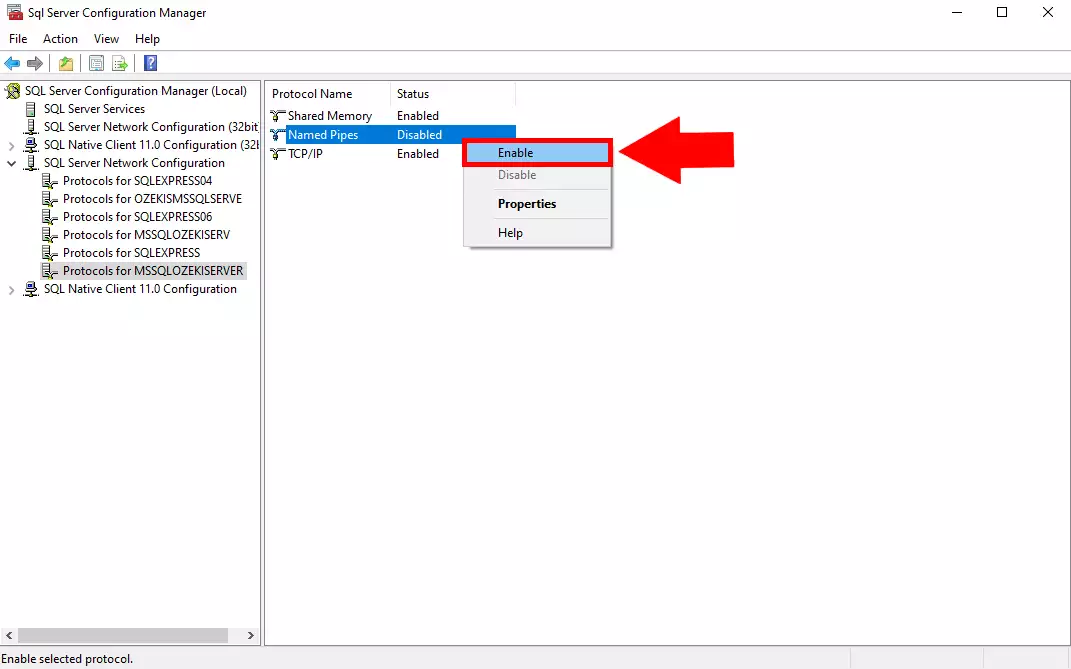
The other important option to be enabled is named pipes. Named pipes can be used to provide communication between processes on the same computer or between processes on different computers across a network. If they are not abled, it means that your SQL Service will not be able to communicate with other processes. To enable it, please right click the Named Pipes protocol and choose Enable. You can see the enable button on Figure 4.
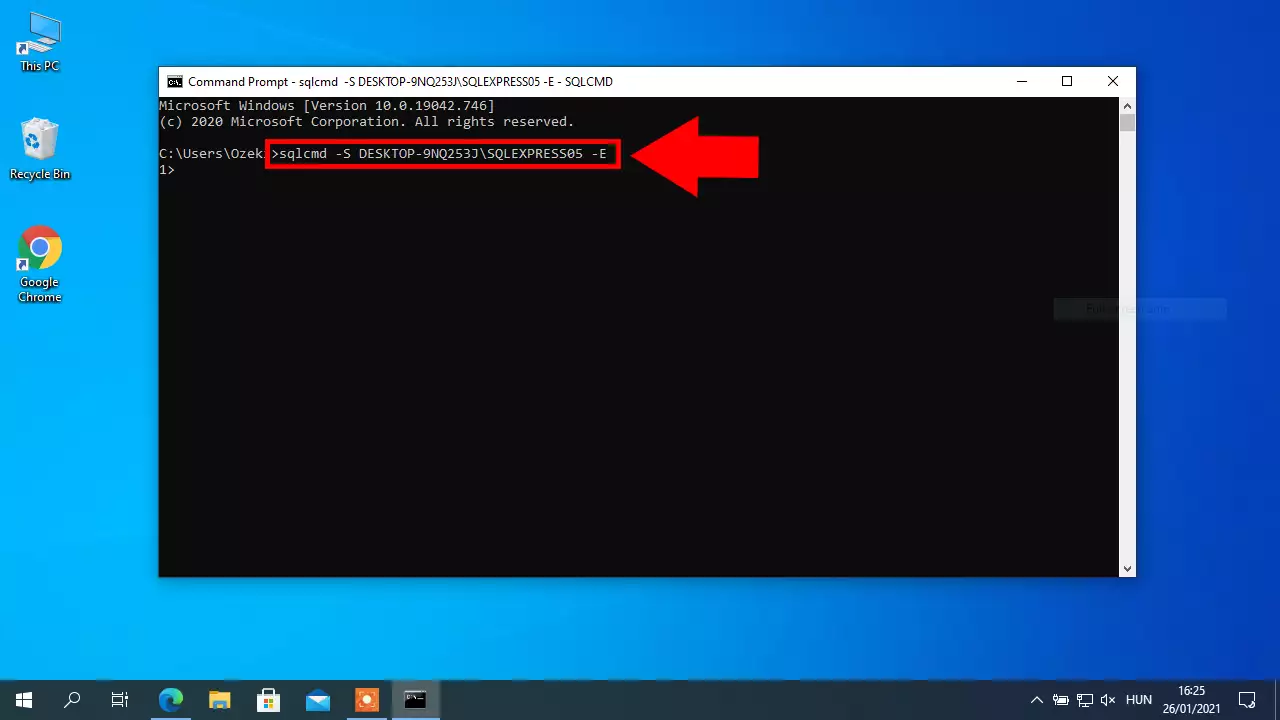
If you would like to create SQL tables with the MS Command Prompt, you will need to connect to the serve first. On Figure 5, you can see the code you will need to type in, in order to connect to the tables and make changes in them. The code is the following :
sqlcmd -S DEKSTOP -9NQ253J\SQLEXPRESS05 -E
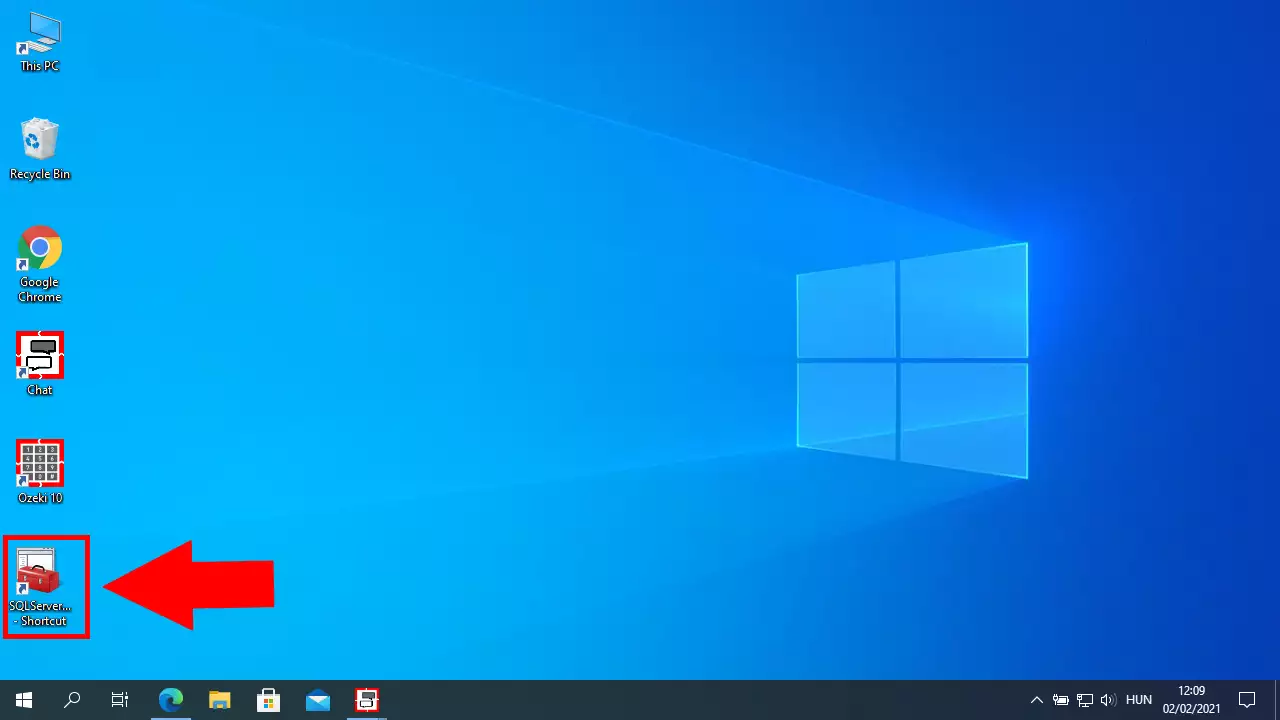
To know all the details about your server, you need to first launch the SQLServerManager15 application. Click on it and it will open the Server Configuration Manager.
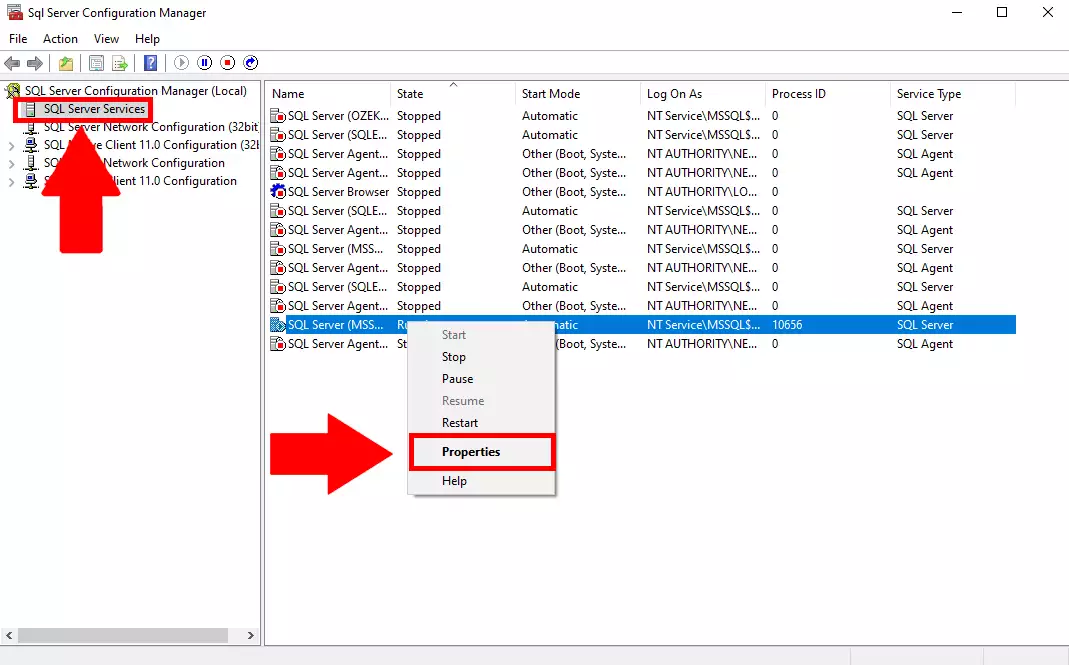
Open the SQL Server Service list member, and search for your server in the options. If you have found it, all you need to do is right click properties. It will open a window where there are all the information about your server.
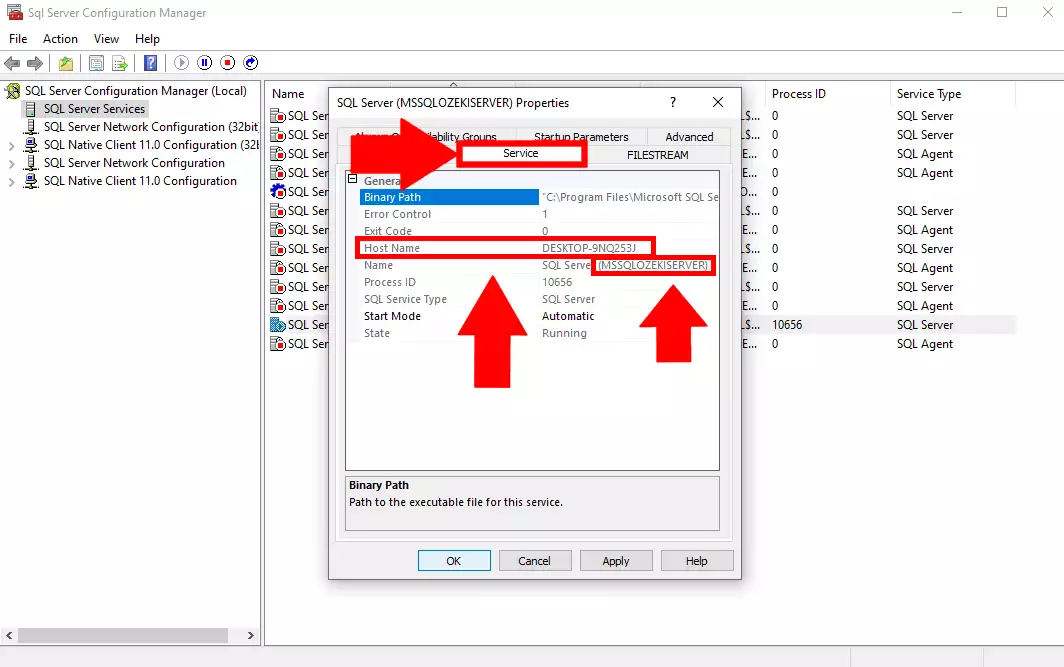
To get information about the service and the connections, please click service on the top menu. It will show you all the info, for example the Host Name, and the Server Name. To exit the app, simply click OK and close the application. You can see our example server on Figure 8.
Sometimes the MS SQL Server Configuration Manager may not appear in the start menu after installation. Instead of searching, you can also get the file in C:\Windows\System32 folder.
SQL Server 2008 SQLServerManager10.msc
SQL Server 2012 SQLServerManager11.msc
SQL Server 2014 SQLServerManager12.msc
SQL Server 2016 SQLServerManager13.msc
SQL Server 2017 SQLServerManager14.msc
SQL Server 2019 SQLServerManager15.msc
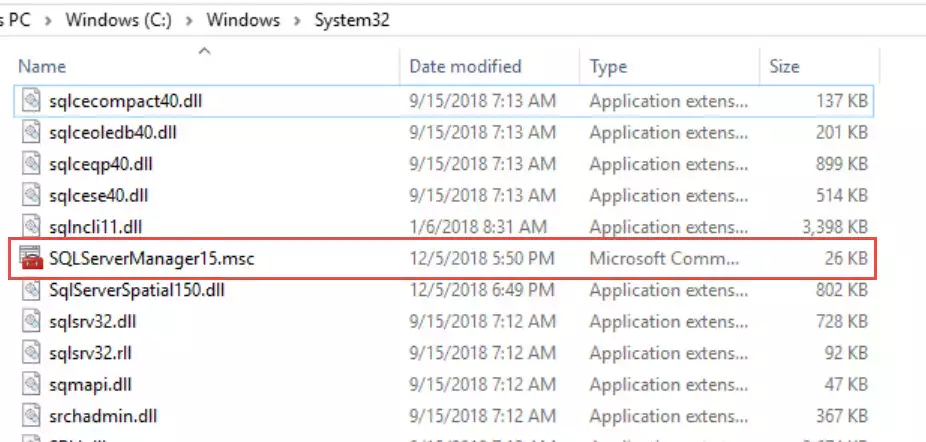
Here is the folder and the file from my latest lab server of SQL Server 2019.
To have the SQL Server Manager back on your Start Menu, you need to find the SQLServerManager15.msc file. Start searching for it in the C:\Windows\System32 folder. If you have found the file please continue to the next step. You can see the file we found on Figure 9.
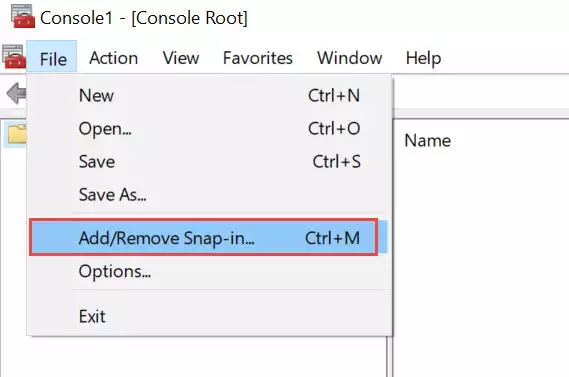
Now you need to open a program called Microsoft Management Console. This program is widely used to manage and display administrative tools, created by Microsoft or other software providers. To do so, please press the windows key on your keyboard, and start typing mmc. The search bar will now show you an icon with the title mmc. Click it and it will open the management console. As you can see on Figure 10, you can add or remove snap-ins by going to the top left corner of the window and clicking File > Add/Remove Snap-in….
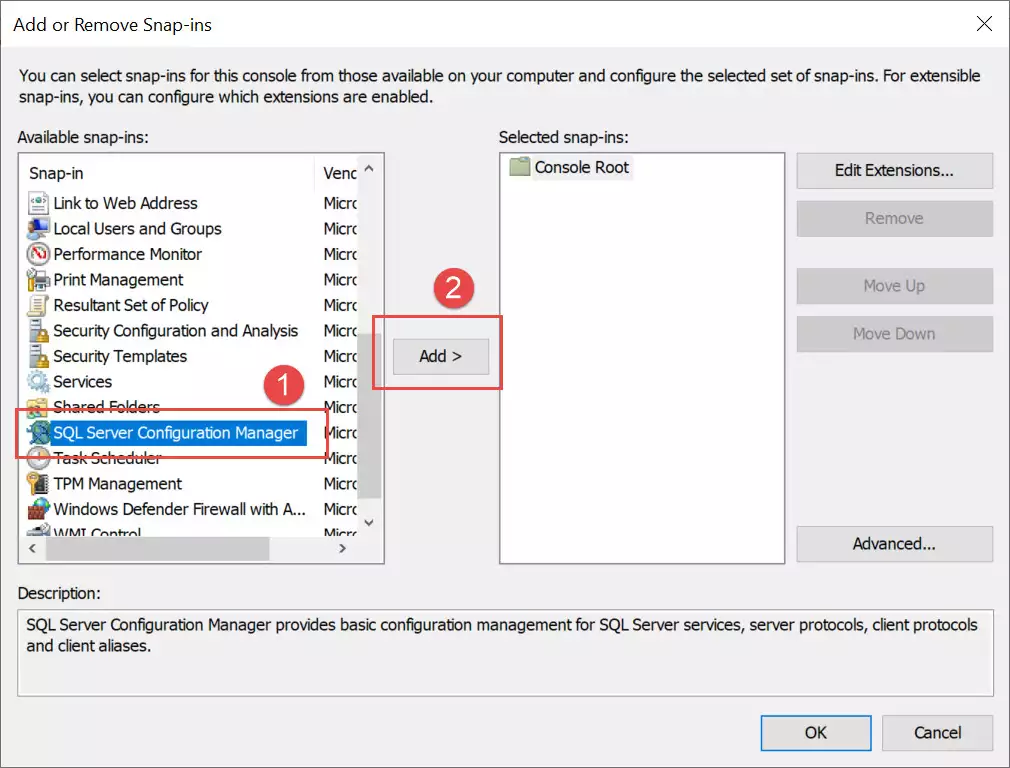
Now you are presented with a window that can Add or Remove Snap-ins. You can see your available snap-ins on the left side of the window, and you installed snap-ins on the right. To install a snap-in, you need to press the Add > button. Please search for the SQL Server Configuration Manager snap-in on the left side, and add it to the installed snap-ins. You can see the procedure on Figure 11.
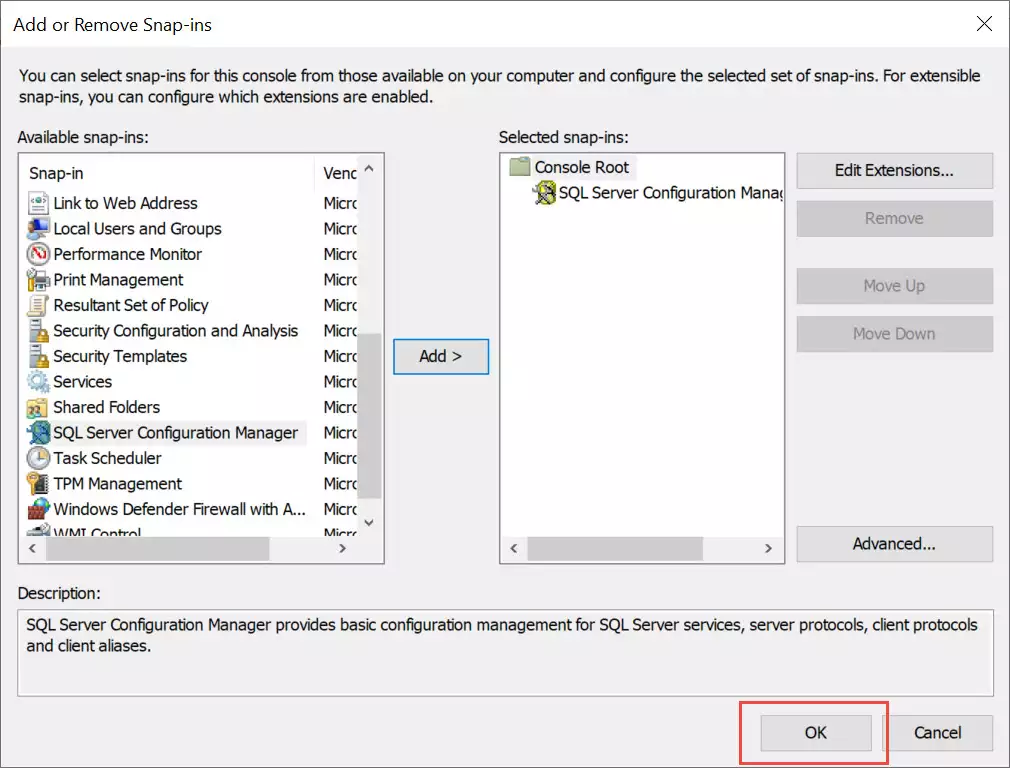
If you have the SQL Server Configuration Manager on the right side, you can click OK and close this window. You can see the OK button on Figure 12.
Now if you have done everything correct, you will see that on the left side of the Microsoft Management Console, under the Console Root title, there is the SQL Server Configuration Manager. You can find it with the help of Figure 13.

Another method would be to create a shortcut for the program below
If it is still not possible to connect, please change this registry key:
HKEY_LOCAL_MACHINE\SOFTWARE\Microsoft\Microsoft SQL Server\MSSQL.1\MSSQLServer
LoginMode=2
More information

 Sign in